Acquiring My Own ASN
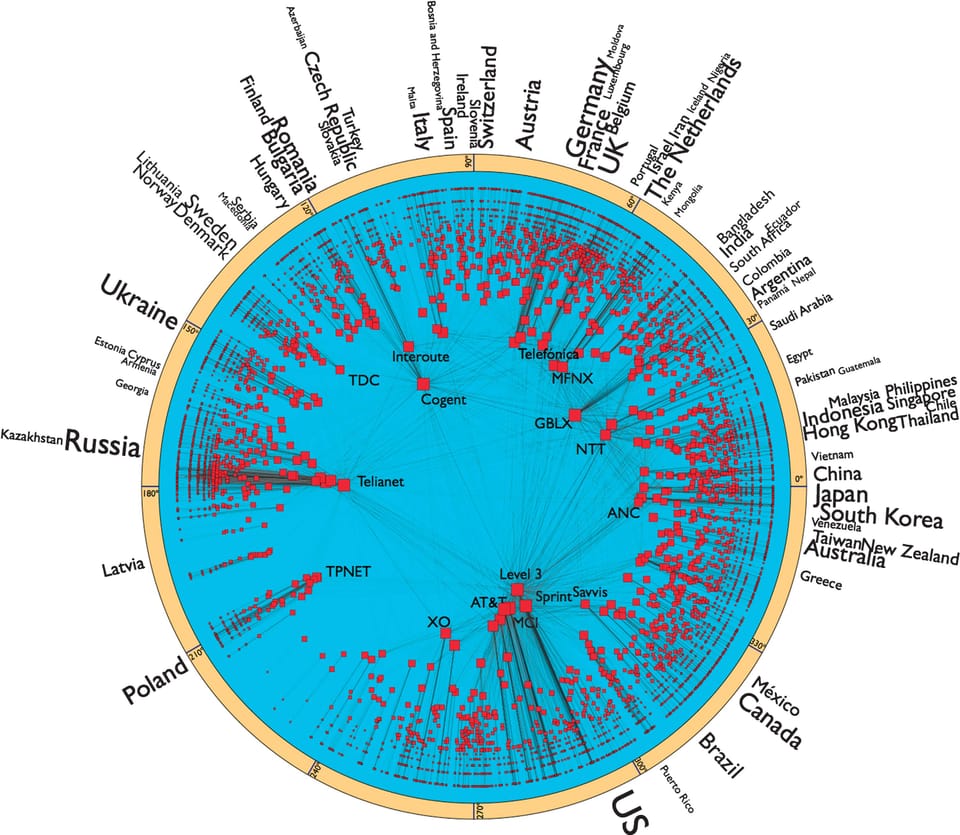
For the past year, I have been contemplating the idea of getting my own ASN. I even considered becoming my own ISP, but it turned out to be too expensive, so I gave up on that front.
But why get my own ASN? After all, it requires a commitment of both time and money. Well, here is how I justified it to myself:
- It's cool.
- I wanted to learn more about BGP, multi-homing, anycast, and similar concepts in a real-world environment.
Moreover, for a long time I've been planning to implement a high-performance L4 load balancer similar to Cloudflare's Unimog and I thought having my own anycast network would make the project even cooler. The main reasons I haven't started yet are:
- I initially wanted to build it in C++, but now I genuinely feel that C++'s footprint is shrinking outside the HFT environment. While HFT is incredibly moneymaking, I'm not sure if it's the path I want for the rest of my life, so I need to diversify my skillset. This convinced me to finally learn Rust and use it for this project. Rust is gaining massive traction everywhere (especially in networking software), making it the logical choice. Nothing can replace C in my heart though.
- The tragic events of the January massacre in Iran, followed by the outbreak of the war, completely shattered my focus and passion. On top of that, the regime's Internet blackouts consumed most of my free time. I spent countless hours researching, deploying, and testing circumvention methods just to keep my connection to my family alive and help the people I hold dear connect to the Internet.
- I injured myself and was physically unable to sit at my desk for over a month.
However, it wasn't all bad. I was finally able to reassemble my homelab and get my blogs and other internal services back up and running.
Let's get to the AS/BGP journey!
What is an Autonomous System?
The internet at its core isn't just one giant network; it's a massive global collection of smaller, independent networks that agree to talk to each other. An Autonomous System (AS) is one of those individual networks.
If we think of the entire Internet as some sort of global postal network, an AS would be a town or a postal district. Just like a district has a zip code, every AS has a unique identifier called an Autonomous System Number (ASN). This number is what allows packets (the postal "packages" of the digital world) to find their destination network.
So an AS provides 'grouping' capability. Meaning routers inside the Internet only need to know which AS they need to send packets to, rather than memorizing the full, exact path for each node (like every individual computer or phone) on the Internet. In other words, the main purpose of an AS is to simplify and scale Internet routing. Without them, the Internet would instantly collapse under its own weight.
How to get our own AS?
ASNs are assigned by Regional Internet Registries (RIRs). Since I live in Europe, the responsible RIR for my region is the RIPE NCC.
There are two main ways to get an ASN assigned:
- Becoming an LIR (Local Internet Registry): We register directly with RIPE.
- Finding an LIR Sponsor: An existing LIR sponsors our application to get the ASN.
Becoming an LIR is far too expensive for an individual hobbyist. It costs €1000 just to sign up, plus an annual membership fee of €1800, making it a reasonable choice only for companies and ISPs.
So I looked for an LIR willing to sponsor my ASN registration. There are quite a few providers out there offering this service, and I eventually chose a company called NoPKT. Their sponsorship costs just $60 a year, which is pretty okay for someone like me!
Before going to the LIR service, we need to prepare our RIPE account.
Preparing the RIPE database
After signing up in the RIPE, we need to create three objects: person, role, mntner, and an organization. Your organization name would be your real name unless you have an actual company which you can use its name. Then almost everything else in the RIPE database would be connected to your organization object. Your mntner object would kind of be the 'owner' of that organization.
You need to know that everything you enter in RIPE would be publicly available. So maybe if you want to enter your residential address, you'd want to think twice. People usually rent an address and use that instead or maybe if you're asking a local LIR to sponsor you, they might enter their own address for you. I asked one of them and they refused though.
Now that you have your RIPE database records in place, it's time to reach out to a LIR.
Contacting the LIR
Once we have chosen our sponsoring LIR, we will ask them to sponsor our ASN registration.
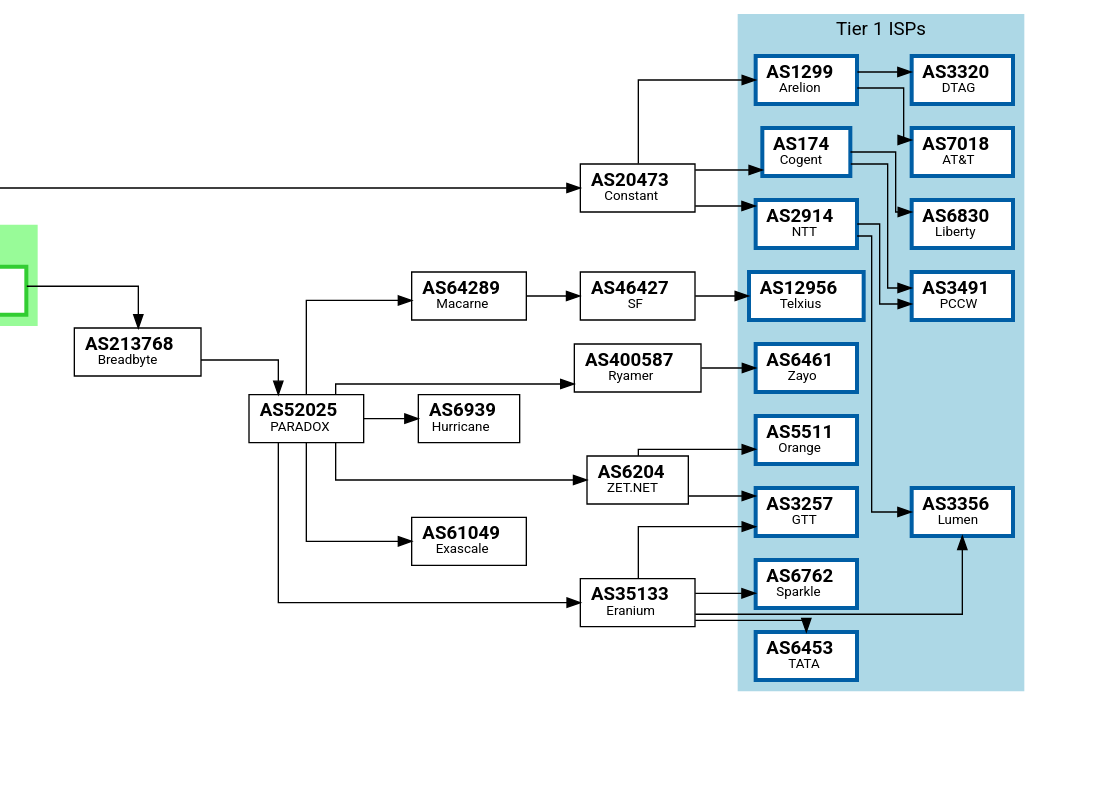
To satisfy RIPE's requirements, we must provide the ASNs of at least two independent networks that we plan to peer with. RIPE doesn't actually check if we end up establishing BGP sessions with these specific networks later on. We just need to list them for the sake of fulfilling the multi-homing policy. For my application, I listed Vultr (AS20473) and Breadbyte (AS213768). I actually did end up using both of them as my real upstream providers though.
After we hand over the required information such as our RIPE Organization ID and our intended peers, and maybe complete the extra steps required by the LIR itself (which usually involves a RIPE-generated identity verification link), we will just wait. They will send you an email saying that you are now officially an owner of a shiny new ASN and a /48 IPv6 block! :)
Announcing Our Prefixes
Now that we have an ASN, we can start announcing our IP prefixes to the world. To make this happen, we need to find upstream transit providers or peers willing to establish a BGP session with us. There is this website called bgp.services which has a comprehensive, community-driven list of data centers and hosting providers that offer BGP sessions. Feel free to take a look at the list and explore your options. For a hobbyist project, you will most likely want to look for providers that include BGP sessions for free rather than charging an extra monthly add-on fee. I ultimately settled on Vultr and Breadbyte because their VPSes are affordable, and both providers allow you to establish a BGP session even on their lowest-tier plans.
Update the RIPE database
Once we have picked we upstream providers, we need to update our aut-num (Autonomous Number) object in the RIPE database by adding our specific import and export routing policies. You can look up other ASNs on bgp.tools to see how they have structured their records, but in general, you will want to define these fields for each upstream provider:
import: from AS213768 accept ANY
export: to AS213768 announce [your ASN]
Sign the IP Prefix
Historically, BGP is a protocol built entirely on trust. What does that mean in practice? It means BGP operates on an honor system. If an AS announces to the world, "Hey! I own Google's IP addresses; send all their traffic to me!" Neighboring routers will blindly believe it and redirect Google's traffic to that network.
This vulnerability is known as a BGP Hijack. While BGP hijacking can be weaponized by malicious actors, it is more frequently caused by a poor tired network engineer pushing an incorrect configuration and accidentally leaking routes.
I vividly remember an example of BGP hijacking from 2018 when the Islamic regime in Iran attempted to block Telegram domestically; they used BGP hijacking to redirect the platform's traffic to a black hole [[1]]. Because of how BGP propagates across the globe, they accidentally hijacked the routes globally, knocking Telegram offline for millions of users outside of Iran's borders.
Resource Public Key Infrastructure (RPKI)
One of the main mechanisms used to secure the routing table is RPKI, which is also referred to as resource certification. At its core, RPKI is a cryptographic mapping system that allows an organization (you) to cryptographically prove ownership over a specific block of IP addresses. By signing these resources, we can explicitly say which AS is authorized to originate our IP prefixes on the global Internet.
ROA (Route Origin Authorization)
If RPKI is the security framework, ROA is the certificate itself. In short, an ROA is a cryptographically signed document created by the IP prefix holder. It explicitly says which AS is permitted to advertise a specific IP prefix, along with the "maximum length" (the maximum prefix size, or how small a sub-allocation can be when advertised).
Because I am renting the prefix through a sponsoring LIR rather than owning it directly, I needed the LIR to issue this certificate on my behalf. Fortunately, my LIR (NoPKT) provides a web panel where I could generate the ROA automatically with a single click.
Configuring the BGP Session
With everything finally in place, we can configure our BGP sessions and start advertising our prefix. As I mentioned, I chose Vultr and Breadbyte as my upstream providers. Every provider has its own onboarding requirements, so you will need to check their documentation or reach out to support to request a BGP session.
For instance, Vultr required me to open a support ticket and provide "proof of authorization" for both the ASN and the prefix. They also asked whether I wanted to receive the full table or just a default route. A full table means your router receives the entire path layout of the Internet. A default route means your router doesn't know the exact external paths; it just passes all outbound traffic to the provider's gateway. I wanted to observe the global routing paths, so I opted for the full table.
BIRD (BIRD Internet Routing Daemon)
To establish our BGP sessions and handle prefix advertisements, we need a routing daemon. For this, I chose BIRD.
But here's the thing: because I am using the cheapest machines on Vultr and Breadbyte, I only have 1 GB of memory to work with. A full Internet routing table requires more memory than that. I decided to only go for the IPv6 routes for now. Since I was only dealing with an IPv6 prefix at the time anyway, this seemed reasonable. Anyway, here is my IPv6-only BIRD configuration for Vultr:
log syslog all;
router id 1.1.1.1;

define MY_AS = [MY ASN];
define MY_NETS_V6 = [ [My ipv6 prefix] ];

# IPv6 bogons (never accept from a peer)
define BOGONS_V6 = [
    ::/8+,
    64:ff9b::/96+,
    100::/64+,
    2001::/32{32,128},
    2001:2::/48+,
    2001:10::/28+,
    2001:db8::/32+,
    2002::/16+,
    3ffe::/16+,
    fc00::/7+,
    fe80::/10+,
    fec0::/10+,
    ff00::/8+
];

# ============================================================
# Filters
# ============================================================

# Outbound: announce only our own prefix
filter export_to_upstream {
    if (net.type = NET_IP6 && net ~ MY_NETS_V6) then accept;
    reject;
}

# Inbound: full table, but drop bogons / our own / defaults / junk
filter import_from_upstream_v6 {
    if net ~ BOGONS_V6 then reject;
    if net = ::/0 then reject;            # we want full table, not default
    if net ~ MY_NETS_V6 then reject;       # don't accept our own back
    if net.len > 48 then reject;           # standard max accepted prefix length
    if net.len < 12 then reject;           # sanity floor
    if bgp_path.len > 100 then reject;     # absurd path = leak
    accept;
}

# ============================================================
# Kernel sync — IPv6 only
# ============================================================
protocol device { }

protocol kernel {
    ipv6 {
        import none;
        export filter {
            if source = RTS_STATIC then reject;
            krt_prefsrc = [an IP in my IPv6 space];
            accept;
        };
    };
    learn;
}

# ============================================================
# Originate our v6 prefix
# ============================================================
protocol static static_v6 {
    ipv6;
    route [My ipv6 prefix] blackhole;
}

# ============================================================
# Vultr — IPv6 only
# ============================================================
protocol bgp vultr_v6 {
    description "Vultr IPv6 transit (full table)";
    local as MY_AS;
    source address [My machine's IPv6 address];
    neighbor 2001:19f0:ffff::1 as 64515;
    multihop 2;
    password "My BGP session password";

    ipv6 {
        import filter import_from_upstream_v6;
        export filter export_to_upstream;
        import limit 400000 action restart;  # ~2x current size as headroom
    };
}
The configuration for Breadbyte is basically the same thing, with only minor adjustments to match their infrastructure. Vultr requires the multihop 2 directive because their BGP peer is located two hops away, whereas Breadbyte's BGP daemon acts as an immediate neighbor. See Vultr's BGP configuration guide.
The configuration above is very simple and doesn't do much. I tried to be as defensive as I could: I created two filters, one for import (routes that we receive from our neighbor) and the other one for export (routes we push to our neighbor).
On import, I strip bad prefixes (Bogons), drop the default route (::/0) because I want the full table, I drop my own IP block if it loops back, and I won't accept prefixes more specific than /48 (appears to be a standard Internet filtering thing), and I reject routes that have insanely long AS-paths (> 100) because it is usually an indication of a routing leak somewhere down the line.
On export, I only verify that the prefix I'm sending is IPv6 and is the one I actually own. This hopefully will prevent route leaks to my upstreams from my side.
Now we should be able to see the connection is established:
moorko@vultr-nl01:~$ sudo birdc show protocols
BIRD 2.17.1 ready.
Name       Proto      Table      State  Since         Info
device1    Device     ---        up     2026-05-17
kernel1    Kernel     master6    up     2026-05-17
static_v6  Static     master6    up     2026-05-17
vultr_v6   BGP        ---        up     2026-05-17    Established
As for IPv6, we should receive around 200,000 routes:
moorko@vultr-nl01:~$ sudo birdc show route protocol vultr_v6 count
BIRD 2.17.1 ready.
235719 of 235720 routes for 235720 networks in table master6
Some Notes
In case you want to go with Vultr (or probably any other provider that requires a multi-hop session), you likely need a static route to the BGP peer before running BIRD because it'll overwrite the routes to the peer and make them unreachable mid-session. We can prevent it by running something like:
sudo ip -6 route add 2001:19f0:ffff::1 via [ipv6 gateway]You also need to assign the IPv6 address you specified in your BIRD configuration under krt_prefsrc to a local interface on your machine. This can be done by binding it to a dummy network interface or simply attaching it to the loopback.
And that’s about it! Give it a couple of hours, and you should be able to head over to bgp.tools to see your peer connectivity diagram visualized:
Conclusion
In this post, I reviewed the steps I took to acquire my own ASN and begin advertising my own IP prefixes to the global routing table. I am still relatively new to this part of the computing world, but the mechanics of this whole thing are incredibly fascinating to me.
For now, I have many vague ideas of what to do with these resources next; my ideas range from analyzing Internet routes (maybe I too can monitor Internet blackouts that will happen in Iran in the future) to implementing my own anycast network. Who knows, maybe some day I will even be able to contribute directly to open source routing software like BIRD.
For now my long-term focus will be implementing that L4 load balancer I described earlier.
P.S. I also ended up leasing a /24 IPv4 prefix for a year. Probably a bad financial decision hahahaha.